|
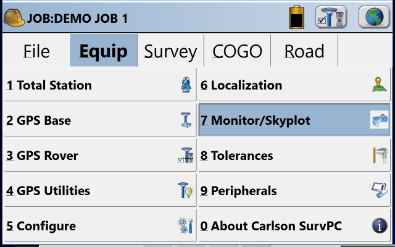
Connecting to an RTN Network in Carlson SurvCE / SurvPC Written by: Ryan Sweeney July 16, 2018 In this Superior Instrument How-To Guide, We will be showing you how to connect a GNSS Receiver to an RTK Network in Carlson SurvCE / SurvPC. We used a Carlson RT3 data collector and Carlson BRx6 for this guide, running Carlson SurvPC 5.0 and connecting the the RTK.Superior network, but the screens you see should be similar on any data collector running SurvPC or SurvCE. 1. In the main Carlson SurvPC/SurvCE menu, tap Equip. 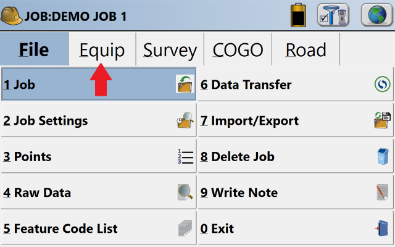
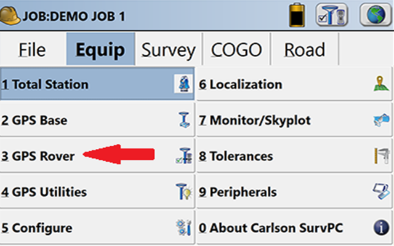
2. Tap GPS Rover. 3. In the GPS Rover window, be sure to select the Manufacturer and Model of the GNSS Receiver you will be connecting to. Tap the down arrows on the right side of the text boxes to pull up the list of manufacturers and models supported in Carlson SurvCE/SurvPC. 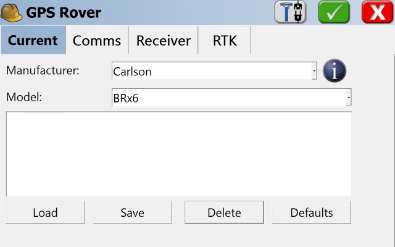
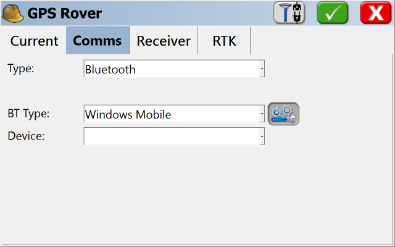
4. In the Comms tab set Type: to bluetooth. If you're connecting to the GNSS receiver with a cable set the Type: to your connection method. Next tap Gear and Wrench icon next to the BT Type: box. 5. If the device you are trying to connect to is listed, tap the device name then tap the bluetooth connection icon in the upper right hand corner. If the device you are trying to connect to is not listed, tap the Find Device button. 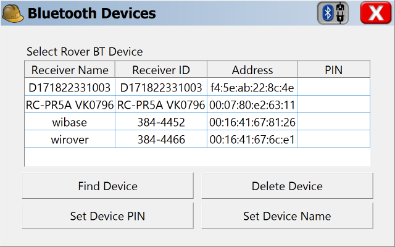
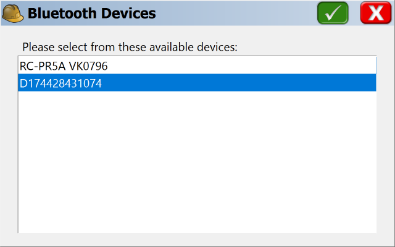
6. On this screen, your data collector will be searching for your GNSS receiver. Be sure the device is powered on. When your data collector finds the receivers bluetooth connection, tap on the device name. The device name is typically the device serial number. When done, tap the green check mark button in the upper right hand corner. 7. Back on the Bluetooth Devices menu, tap the device you just found and tap the bluetooth connection icon in the upper right corner to connect to it. 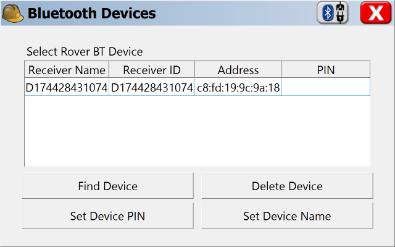
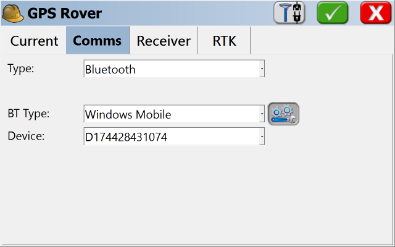
8. You will be brought back to the GPS Rover menu. You should see your device listed in the Device: drop down menu. If not, select the down arrow and pick your device name. Next select the Receiver tab. 9. 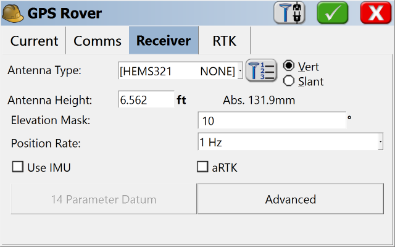
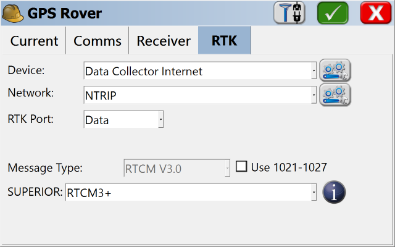
10. 11. 
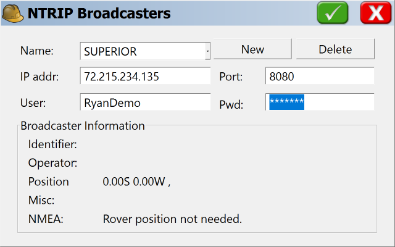
12. 13. 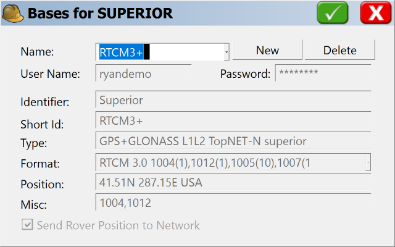
14. 15. 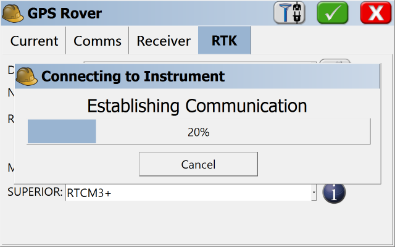
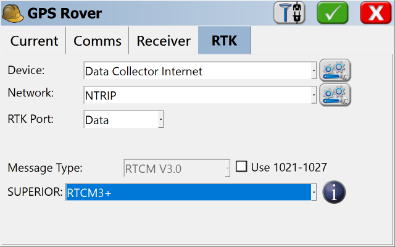
16. 17. 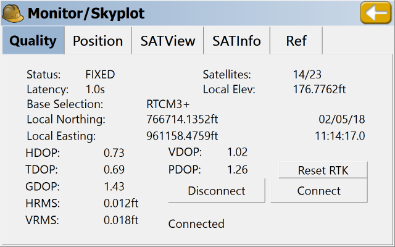
|